Heart Lab: Lee Meszaros
Lee makes THE MOST adorable merit badges on the face of this Earth.... I kid you not! You can snag one over at goodEGG or from her Etsy shop at leemeszaros.etsy.com. Lee, thanks for agreeing to give us a peek at your process...

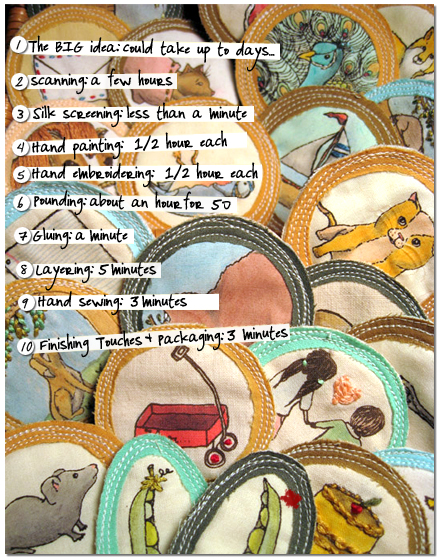
Step 1. Thinking of common sayings and idioms that make sense to reward with a badge, and also contain a good visual for me to (attempt!) to draw. Usually ones with animals, random objects and food work out the best.
Time: sometimes days and days. I keep a notebook with me all the time to write down sayings I think of and hear.
 Step 2. Scanning all of the drawings onto my computer to compile in Photoshop into one printout. Then using that sheet to expose a silkscreen.
Time: a few hours usually if nothing goes awry.
 Step 3. Silk screening the various line drawings in black pigment on cotton. (Usually in multiples to save time.)
Time: less than a minute each.
 Step 4. Hand painting the colour into each line drawing with watered down fabric pigment.
Time: around ½ hour each depending on how complicated.
 Step 5. Hand embroidering little details onto each image.
Time: about a ½ each as well, also depending on how complicated.
 Step 6. Pounding out the coloured ring border pieces, and the backing circle out of interfaced broadcloth in nicely dyed colours using some spiffy die cuts. I'm in the process now of getting a little die press made instead of the manual pounding. (Before the die cuts this step was done all by hand cutting traced circles- nightmare!)
Time: Done in multiples, so about an hour for 50.
 Step 7. Gluing the coloured rings to each image and cutting around the ring to remove excess fabric.
Time: a minute.
 Step 8. Layering the image, inside padding, and backing circle together and sewing them together with a sewing machine.
Time: 5 minutes
 Step 9. Hand sewing a pin back onto the back of each badge. (Tip: waxing the thread with a little bee's wax keeps it from tangling, and saves me from many sewing related meltdowns.)
Time: 3 minutes.
 Step 10. Pinning each badge onto it's display card and sealing them into their protective plastic pouches.
Time: 3 minutes.
Make sure you visit Lee's shop at leemeszaros.etsy.com!
Thanks Lee!!


3 comments:
thanks for the peek into the process....i totally agree, the idea for something takes the longest!
these are so great...love them
michelle
oh,oh,oh! I love and adore these! They are so wonderful!
xo
Melis
Thanks for your comments Michelle and Melissa. Hmmmm, I'm in the mood to do some good :)
Post a Comment